KDE.org/Jekyll: Difference between revisions
Thiagosueto (talk | contribs) m (→Tutorial) |
Thiagosueto (talk | contribs) |
||
| Line 288: | Line 288: | ||
Ubuntu: {{Input|sudo apt install ruby-dev bundler git}} | Ubuntu: {{Input|sudo apt install ruby-dev bundler git}} | ||
openSUSE: {{Input|sudo zypper install ruby-devel ruby2.6-devel bundler git}} | openSUSE: {{Input|sudo zypper install ruby-devel ruby2.6-devel bundler git}} | ||
Fedora: {{Input|sudo dnf install ruby-devel git redhat-rpm-config}} | |||
Arch: {{Input|sudo pacman -S ruby ruby2.6 ruby-bundler git}} | Arch: {{Input|sudo pacman -S ruby ruby2.6 ruby-bundler git}} | ||
Latest revision as of 05:16, 3 December 2020
Jekyll is a static site generator. In this tutorial, I will explain how to /create a new website using Jekyll and the KDE Jekyll theme.
Local installation
You will need to install gem. In Arch Linux the package name is gemrb.
After this you can install Bundler and Jekyll with gem
gem install bundler jekyll
jekyll new my-awesome-site^C
cd my-awesome-site
bundle install --path vendor/bundle
With this you get the standard Jekyll theme, we will now switch to the beautiful Aether theme.
In Gemfile, you can replace the content with:
source "https://rubygems.org"
ruby RUBY_VERSION

gem "jekyll", "~> 3.8"
gem "jekyll-kde-theme"
and in _config.yml, change the value from theme to jekyll-kde-theme and remove the plugin field.
You can now update the ruby dependencies and download the jekyll theme:
bundle update
Now create the file css/main.scss with:
---
# Only the main Sass file needs front matter (the dashes are enough)
---

@charset "utf-8";

@import "base.scss";
@import "social.scss";
@import "glyphs.scss";
@import "download.scss";
@import "home.scss";
and index.html with
---
layout: default
css-include: /css/main.css
sorted: 1
---

<section id="kHeader" class="carousel">
    <div class="carousel-item active">
        <div class="carousel-item-content pl-4 pr-4">
            <div class="slide-background" style="background-image: url(/assets/img/screenshot.png)"></div>
            <div class="carousel-text-overlay">
                <h1>{{ site.title }}</h1>
                <p>Hello World</p>
            </div>
        </div>
    </div>
</section>


<main aria-label="Content" id="content" class="container">
    <h1>{{ site.title }}</h1>

    <p>Description</p>
</main>
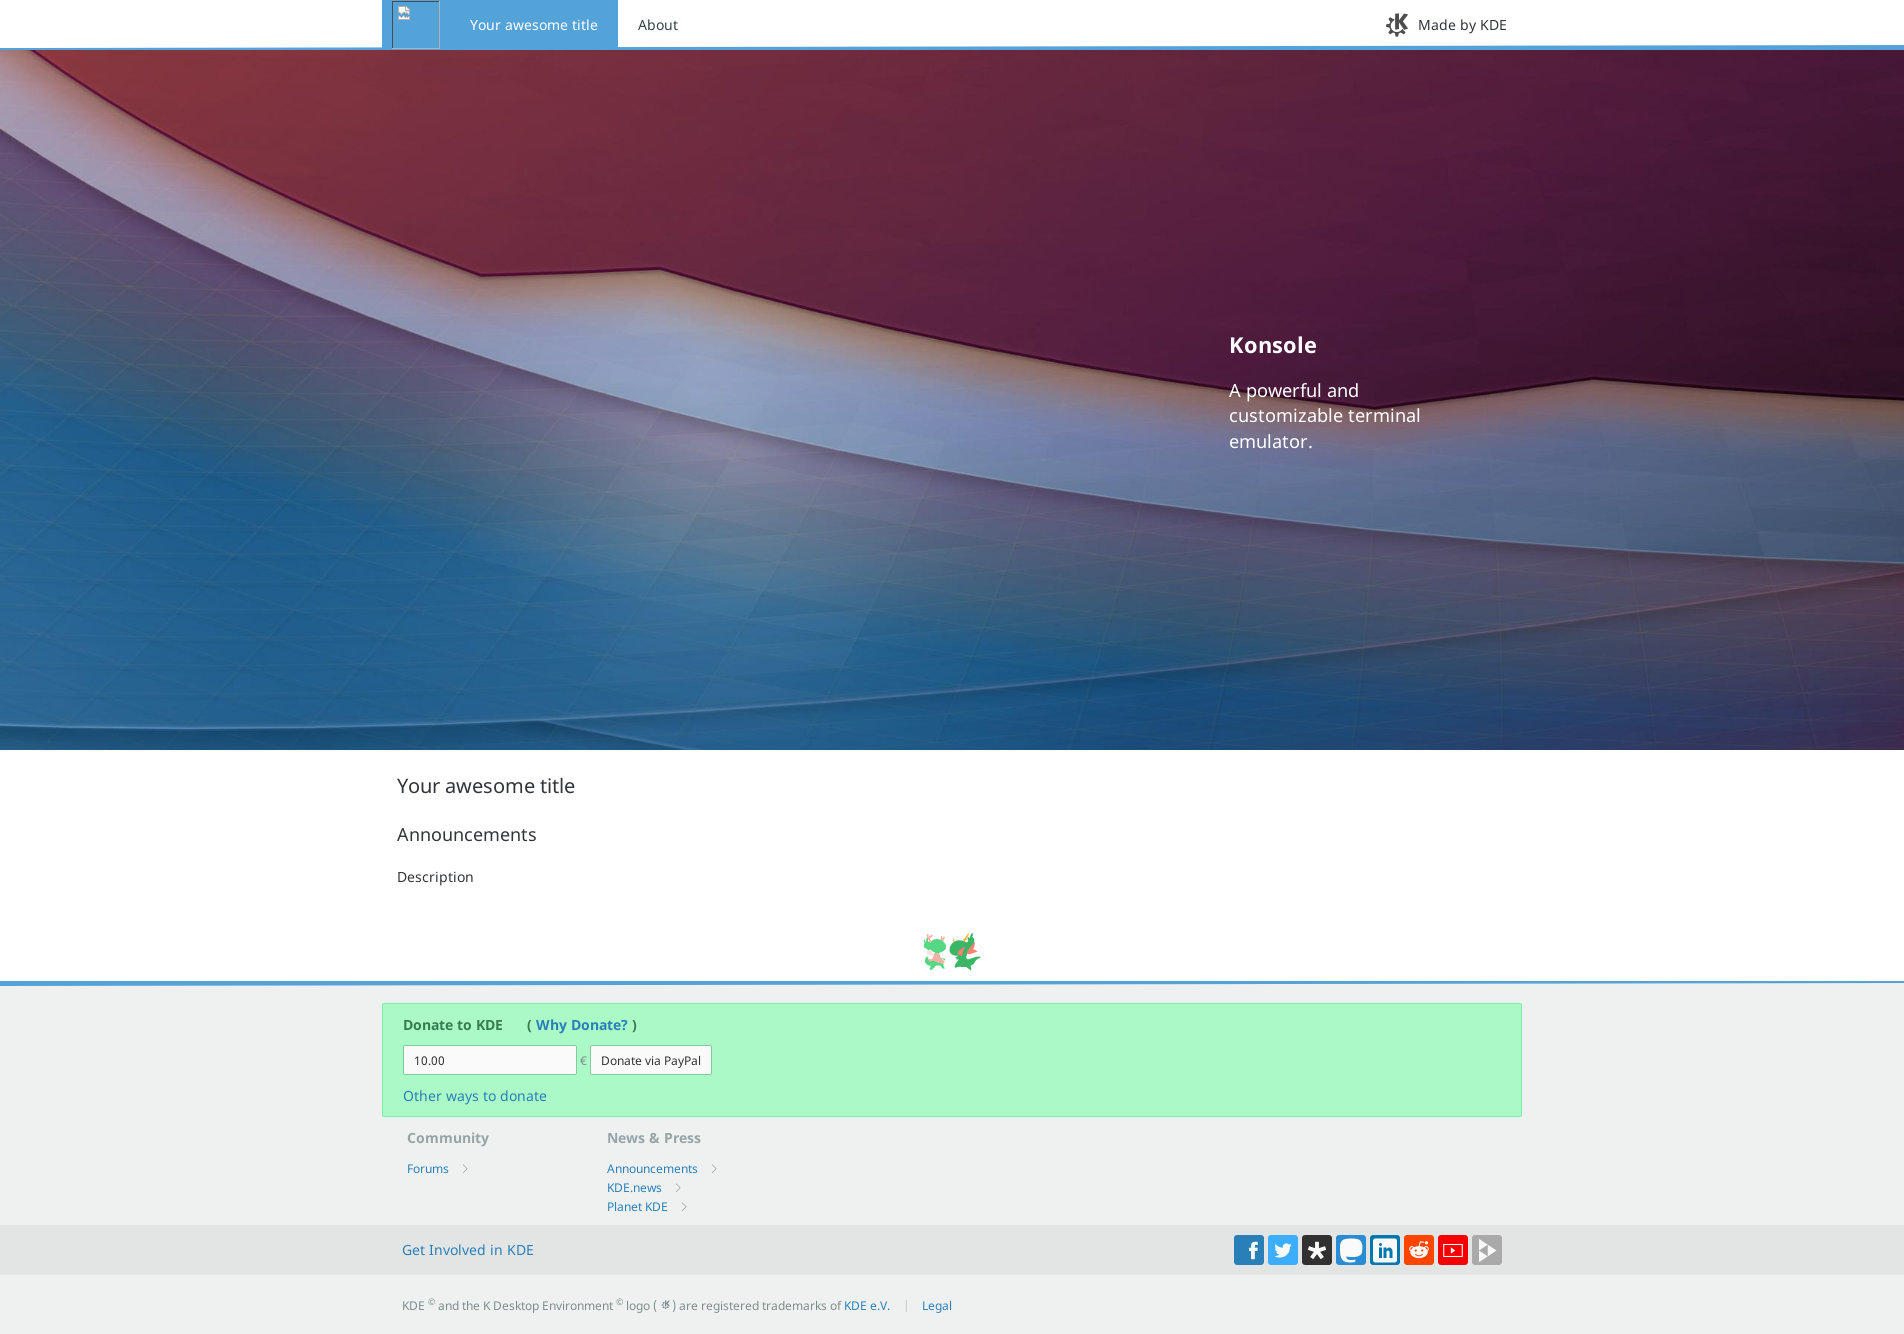
You should now see something like this:
You can now add a screenshot of you app in /assets/img/screenshot.png and a icon in /assets/img/app_icon.png.
---
Tutorial
The first thing we’ll need to do is install the programs required to create the website. Just install: ruby-dev bundler git using your distribution package manager, and we’re set to go!
Let’s download the KDE repository containing the original KDE Jekyll theme. This way, we can both explore the repo and obtain the examples folder. Run the following command:
git clone https://invent.kde.org/websites/jekyll-kde-theme.git
Inside, there are mainly three folders we should take a look at: /css, /_sass, and /examples.
Inside /_sass, there are several /.scss files which should be the foundation of the KDE theme. If you already have some experience with these files, you should know that they can be imported to any website that uses the theme by adding an @import inside a /main.scss.
Inside /css, the file /main.scss is located. Here you can see that the various .scss files you previously saw in the /_sass folder are being imported into the project. Any extra CSS shoud be contained either within main.scss or any .scss file you create within this folder.
If you check the /examples folder, you can see two folders: /application and /application-components. The first is a general example for building any application website; the latter is useful for bundled applications, as is the case of kontact.kde.org. For the purpose of this post, your main concern should be copying the /application folder to another place, more fitting for work.
In my case, for instance, I was planning to create the website for Subtitle Composer, so I put the folder inside my home folder. I then renamed it to /subtitlecomposer-kde-org, so as to follow the pattern found over KDE’s Gitlab instance, Invent.
How stuff works
With this, we now have an example website to improve. Let’s take a look at the structure of what you will change to make it a proper website for a KDE application:
Output from tree showing the example file structure.
.
├── assets
│   └── img
│       ├── app_icon.png
│       └── screenshot.png
├── _changelogs
├── css
│   └── main.scss
├── _posts
├── _site
├── vendor
├── changelog.md
├── _config.yml
├── download.md
├── Gemfile
├── Gemfile.lock
├── get-involved.md
├── index.html
├── README.md
└── users.md
First of all, there are the folders /assets/img and /css. /assets/img is pretty straightforward, it’s where you’ll put any media you want to display on the website that’s not displayed by the theme. The already present app_icon.png is what will be displayed on the upper left of the website, screenshot.png will be used to display the application screenshot inside the main example carousel.
As already mentioned, the /css folder is where you should store any .scss files you’d like to create, in addition to main.scss. Inside it, you should already see home.scss and download.scss. The absolute minimum required should be home.scss, though.
Your example website should also have a .gitignore. This is important since Jekyll generates extra folders and files when compiled, and we don’t want them to be unnecessarily uploaded to our future repository when we push it to Invent.
The two main configuration files you should pay attention to are Gemfile and _config.yml. Gemfile is what determines the use of Jekyll and the KDE Jekyll theme, it should have something like:
Content of Gemfile.
source "https://rubygems.org"
ruby RUBY_VERSION
gem "jekyll", "3.8"
gem "jekyll-kde-theme", path: '../../'
You should always change the path of the jekyll-kde-theme to git, it’s the main way the theme is distributed for all KDE application websites to receive fixes as soon as possible. You also need it if you want to use a dark theme on the website. You need to switch that line to include the following:
gem "jekyll-kde-theme", :git => 'https://invent.kde.org/websites/jekyll-kde-theme.git'
As for the _config.yaml, it’s where most metadata for the website will be stored, and it’s also what determines the website’s structure:
Default _config.yaml structure.
# Site settings
title: Konsole
email: [email protected]
git: https://cgit.kde.org/konsole.git/
handbook: https://docs.kde.org/trunk5/en/applications/konsole/index.html
forum: http://forum.kde.org/viewforum.php?f=227
description: >
    Konsole: the KDE Terminal Emulator
baseurl: "" # the subpath of your site, e.g. /blog
url: "https://konsole.kde.org"
twitter_username: kde_community
github_username:  kde

# Build settings
markdown: kramdown
theme: jekyll-kde-theme
sass:
  style: compressed
[...MORE CONFIGURATIONS NOT SHOWN...]
You should change the appropriate information there by checking the previous website for the application you’re designing it for, or by contacting the devs directly if they don’t already have a website.
I’ll elaborate a bit more on the role of this file on the structure of the website later.
After reading the config files, the first file we should take a look at should be index.html.
Default index.html example.
---
layout: default
css-include: /css/main.css
sorted: 1
---

<section id="kHeader" class="carousel">
    <div class="carousel-item active">
        <div class="carousel-item-content pl-4 pr-4">
            <div class="slide-background" style="background-image: url(/assets/img/screenshot.png)"></div>
            <div class="carousel-text-overlay">
                <h1>Konsole</h1>
                <p>A powerful and customizable terminal emulator.</p>
            </div>
        </div>
    </div>
</section>


<main aria-label="Content" id="content" class="container">
    <h1>{{ site.title }}</h1>

    {% include blog.html %}

    <p>Description</p>
</main>
The section within --- is a bit of metadata determining what should be included on the website, it is called Front Matter, you can read more about it here. It should be present regardless of whether you’ll be working on an HTML or Markdown file.
Then, you can see a section containing a carousel with only one image. You may have noticed that kHeader was also present within the KDE Jekyll /_sass/home.scss file.
That’s what’s convenient in this kind of setup: you can use resources already available by the theme by just calling them. If you’re already acquainted with those resources, it becomes quite easy to create multiple reproducible builds with them. We will be using a few of those later on.
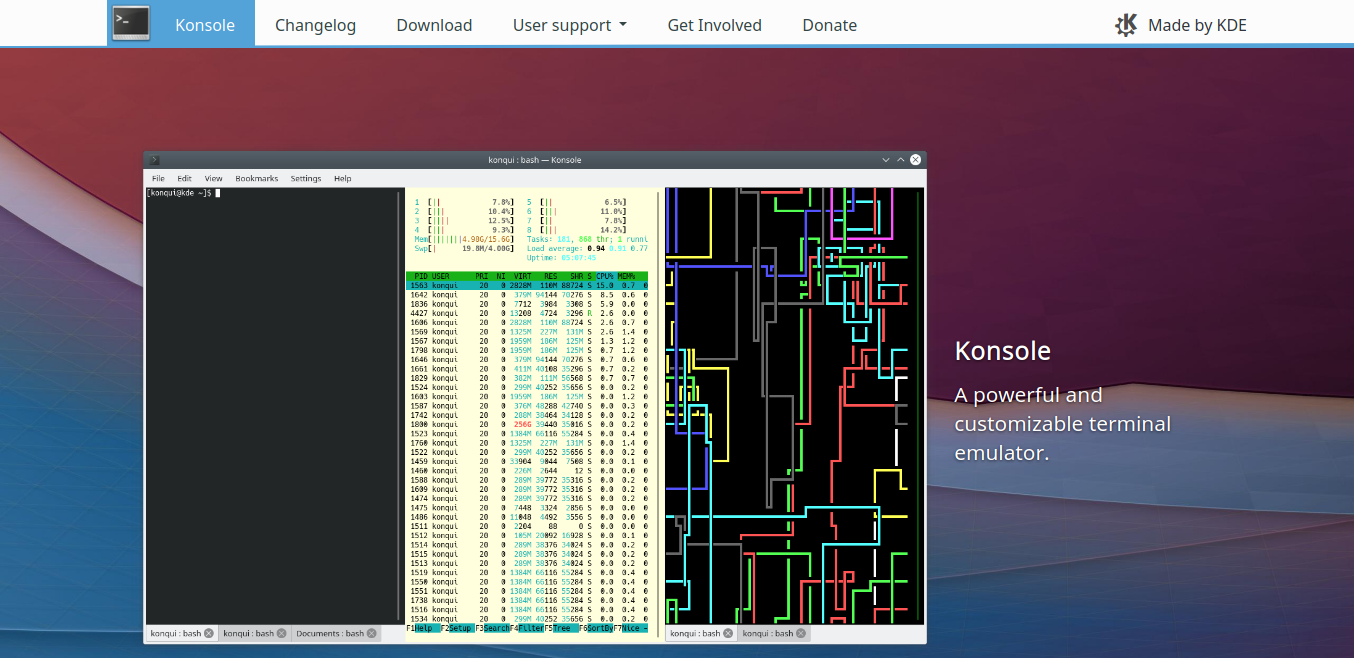
This is how the index.html looks like by default; Konsole is used as a template website in this case.
Figure 1 - Default appearance of example website.

Carousels are generally a bad idea unless they are properly implemented, thus the carousel doesn’t come with more than one image by default. The above Local Installation section doesn't include it either; however, it is the website maintainer’s choice as to whether it should be used or not.
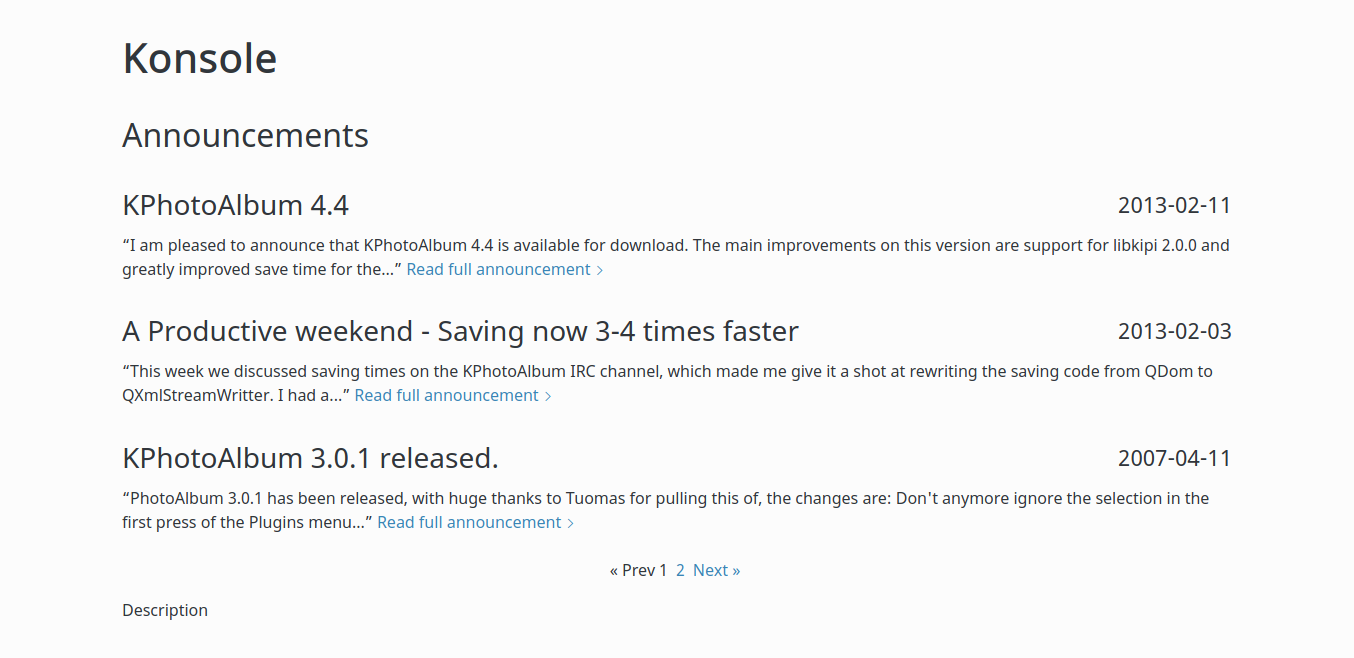
The line we see there containing {% include blog.html %} serves to insert blog.html in the contents of index.html. blog.html, in turn, pulls the Markdown files inside your /_posts folder. Thus, the result:
Figure 2 - Default blog element.

Now, let’s take a look at the get-involved.md file now, which should be easier to understand.
Default get-involved.md example.
---
layout: page
title: Get Involved
konqi: /assets/img/konqi-dev.png
sorted: 5
---

## Get Involved!

TODO

## Build {{ site.title }} from Sources

The [community wiki](https://community.kde.org/Get_Involved/development) provides ressource
about settings up your development environment.

## Get in Touch!

Most development-related discussions take place on the [{{ site.email }} mailing list](http://mail.kde.org/mailman/listinfo/{{ site.email }})
Just join in, say hi and tell us what you would like to help us with!

## Not a Programmer?

Not a problem! There's a plenty of other tasks that you can help us with to
make {{ site.title }} better even if you don't know any programming languages!

* [Bug triaging](https://community.kde.org/Guidelines_and_HOWTOs/Bug_triaging) - help us find
  mis-filed, duplicated or invalid bug reports in Bugzilla
* [Localization](https://community.kde.org/Get_Involved/translation) - help to translate
  {{ site.title }} into your language
* [Documentation](https://community.kde.org/Get_Involved/documentation) - help us improve user
  documentation to make {{ site.title }} more friendly for newcomers
* [Promotion](https://community.kde.org/Get_Involved/promotion) - help us promote {{ site.title }}
  both online and offline
* [Updating wiki](https://userbase.kde.org/{{ site.title }}) - help updating the information present in
  the wiki, add new tutorials, ... - help us improve it to make it easier for others to join!
* Do you have any other idea? Get in touch!
Writing in Markdown is particularly easy, and Jekyll interprets each part of Markdown as HTML code, so if you want to add a specific style to something written in Markdown, you’d use its HTML equivalent, so in ## Text for a header, ## would be considered an <h2> tag.
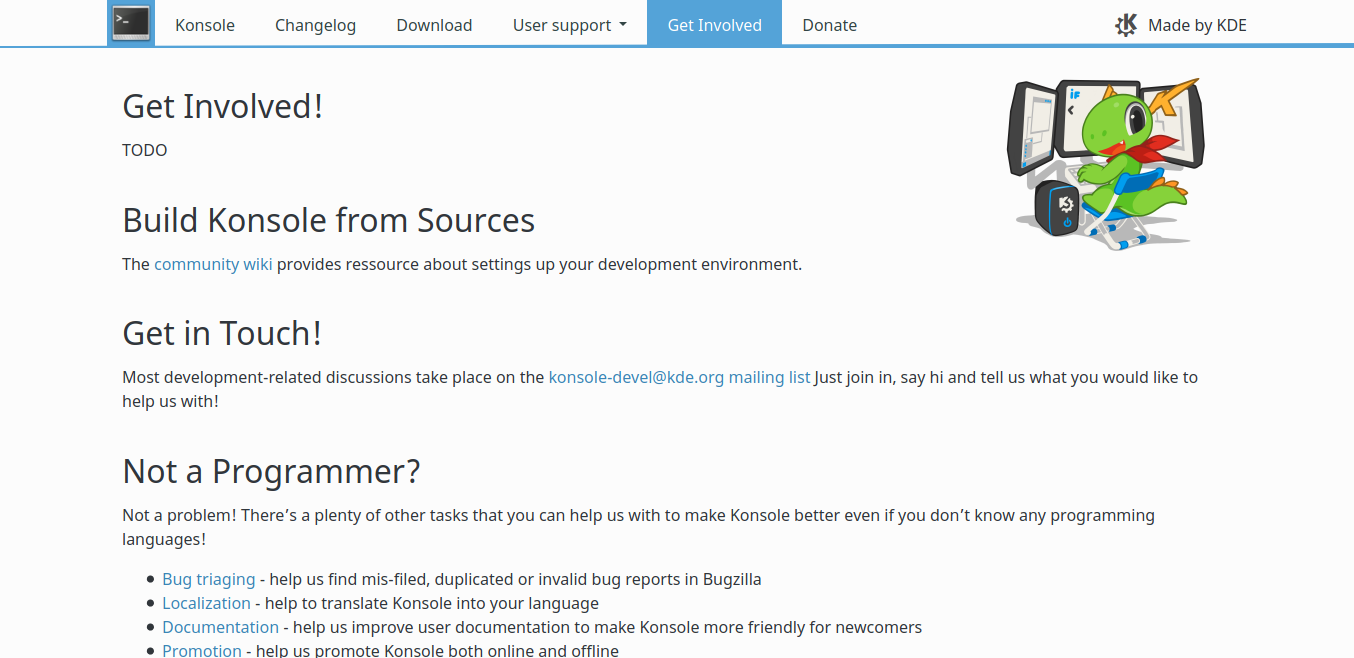
Figure 3 – How default get-involved.md looks like.

The konqi: /assets/img/konqi-dev.png does not pull from the /assets/img folder from your local project, but rather from the Jekyll KDE theme itself. The theme also provides for its layout on the page, so adding this simple line in your Front Matter will show this adorable Konqi icon properly. If any extra Konqi icon is required, they can be added manually to your local installation and called through a konqi: line.
One particular thing that is shown twice in this image is the use of variables. With {{ site.somedataIwanttoshow }} you can call any information present in your _config.yaml. Image XXXX shows two examples: {{ site.title }} and {{ site.email }}, which display on Figure 3 as Konsole and [email protected], respectively.
Let’s build the website now.
So what you previously did if you read the previous text was installing ruby-dev, bundler and git, right? It should be noted that you need Ruby 2.6 as of now. If you only have Ruby 2.7, you’ll face an error in which a gem named eventmachine won’t install. I’ll provide you with the respective commands for Ubuntu/Debian, openSUSE and Arch/Manjaro:
Ubuntu:
sudo apt install ruby-dev bundler git
openSUSE:
sudo zypper install ruby-devel ruby2.6-devel bundler git
Fedora:
sudo dnf install ruby-devel git redhat-rpm-config
Arch:
sudo pacman -S ruby ruby2.6 ruby-bundler git
After that, you likely already cloned the KDE Jekyll repository by using the command git clone https://invent.kde.org/websites/jekyll-kde-theme.git and copied the /examples/application folder elsewhere, renaming the folder to something like /myproject-kde-org, right?
Next you’ll want to change your directory (cd) to the project’s top directory. If it is located in your home folder, you should cd myproject-kde-org.
Already inside, run gem install jekyll --user-install. This will run Ruby’s default dependency manager, gem, which will install the jekyll gem with user privileges, that is, inside your home directory. This is convenient because then you don’t fill your system with gems, and you can install different gems according to the project (not like you’ll need to if you’re just planning on creating one website).
After the command finishes downloading the required gems, run bundle config set path 'vendor/bundle' and afterwards bundle install. The first command determines where to store the gems defined in your Gemfile, namely jekyll and jekyll-kde-theme. The command bundle install subsequently installs them. The later takes a bit to finish.
That’s basically it. With that set up, we can generate our website with bundle exec jekyll serve. You’ll see output like this:
Figure 4 – Serving Jekyll website on localhost at default port 4000.

As you can see, the website should be available by opening a browser and typing 127.0.0.1:4000. If you’re working on a server without a GUI interface, get your ip with ip a and use it with the command:
bundle exec jekyll serve --host my.ip.shouldbe.here --port anyportIwant
Then access it through another machine on your LAN—this includes your phone, which is convenient when you’re testing your website on mobile.
One nicety about Jekyll is the functionality of auto-regeneration. With this properly running, every change you do to a file on your website will show up automatically on it without requiring a “server restart”, so to speak. With this, you can keep the website running on your side monitor (if you have any) while you change files on your main monitor.
If you get an error about Duplicate Directories, just ignore it. This occurs because of a symlink in /examples/application-components which is quite convenient, and this error does not hinder you from generating your website. If you reeeeeeally don’t want your beautiful terminal output to be plagued by an error message, though, you can just remove the /vendor/bundle/ruby2.6/blablabla/_changelogs and /vendor/bundle/ruby2.6/blablabla/_posts folders which are shown in the error output.

