Guidelines and HOWTOs/Using Eclipse
Appearance
Eclipse
 |
This describes how to use Eclipse to develop KDE 4 applications. It has been tested with Eclipse Ganymede and SUSE Linux 11.1 but should work same or similar with every combination. As an example KDE application we use KTimeTracker from the kdepim module, other applications should work likewise.
Using this description you will be able to
- update your working copy of KDE source code using the svn command
- build your KDE module using CMake
- build your KDE application from within Eclipse using Make
- compile and run your application with one click from Eclipse
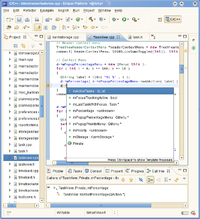
- get auto-completion when editing KDE source code
- have an overview and navigation about your classes within Eclipse
- have call trees for your functions
Set up Eclipse with KDE
- Check your requirements
- Trying with a virtual machine I had problems starting Eclipse with less than 1 GB RAM. After assigning 3 GB RAM to the virtual machine, Eclipse finally started.
- Install Eclipse
- Download Eclipse IDE for C/C++ developers from http://www.eclipse.org. Unpack it to /home/user/eclipse.
- Install the CDT
- Download the Eclipse IDE for C/C++ Developers (68 MB) from http://www.eclipse.org/cdt/ and unpack it into your Eclipse folder, in our case /home/user/eclipse.
- Download kdepim
- As said, we use kdepim as example here. So, download ("checkout") kdepim using git (for advanced git-usage see Guidelines_and_HOWTOs/Git, especially URL-Renaming):
cd /home/user
git clone git://anongit.kde.org/kdepim
- This will check out into /home/user/kdepim. (Our sample setup for this tutorial)
- Compile kdepim
- Compile kdepim so the usual makefiles are present for all kdepim applications. If you have problems doing this, follow our build instructions.
- Import your project into Eclipse
- Surprise: To import your project, you cannot use "File -> Import". Rather do: File -> New -> C++ Project -> Makefile project -> Empty Project -> un-tag "use default location" -> choose /home/user/kdepim/ktimetracker. Call it "ktimetracker".
- Build your project
- Make sure Project -> Properties -> C/C++ Build -> Builder Settings -> Build location -> Build directory is set correctly.
- Choose Project -> Build Project
- Run the project
- Choose Project -> Properties -> Run/Debug Settings -> New. As project, enter ktimetracker, as C/C++ Application, enter /home/user/kdepim/ktimetracker/ktimetracker. Choose Apply -> Ok -> Ok. Now you can click on the "Run" button and start it.
Know-How
Custom builders
If you want to integrate the CMake build step into your build toolchain, you will need to
- create a custom builder like this:
echo "cmake . && make -j4 && make install" >/bin/eclipsebuild
chmod 777 /bin/eclipsebuild
- Add your builder
- Choose Project -> Properties -> Builders. Un-tag all existing builders. Click "new" -> Program -> (name it "Builder for KDE"). -> Location: /bin/eclipsebuild -> Working directory /home/user/workspace/myproject1/kdepim.
- Build
- Now you can build your project. Every time you restart eclipse, choose myproject1 -> Project -> Properties -> C/C++ Build -> Ok -> Project -> Build.
Revert what eclipse did
To revert what eclipse did to your project simply run
rm -rf .externalToolBuilders/ .project .cproject
Why Subversion does not work
When using Eclipse's svn plugin and building a KDE program, you will get error messages complaining that your svn binary is too old. If you want to try and change this, here is how you get to that error:
- Install the Subversion plug-ins
- Help -> Software Updates -> Available Software -> Add Site -> http://download.eclipse.org/technology/subversive/0.7/update-site/ -> Add Site -> http://www.polarion.org/projects/subversive/download/eclipse/2.0/update-site/
- Now add it: Subversive Site -> Subversive SVN Team Provider Plugin
- Subversive SVN Connectors Site -> Subversive SVN Connectors -> SVNKit 1.3.0 Implementation (Optional)
- Click on Install
- Restart Eclipse
- Import your KDE module
- Choose File -> New -> Other -> SVN -> Project from SVN -> https://svn.kde.org/home/kde/trunk/KDE/kdepim -> Check out as project configured using the New Project Wizard -> C++ Project -> Makefile Project -> Empty Project. As name, we choose kdepim5 -> Finish
- Set cmake as build environment
- Choose Project -> Properties -> C/C++ Build -> Builder Settings. Un-tag "use default build command", set "cmake" instead. Choose Project -> Properties -> C/C++ Build -> Behavior. Replace "all" by ".".
See also
- http://javathreads.de/2008/07/subversion-unter-eclipse-ganymede-konfigurieren/
- http://nienhueser.de/blog/?p=19
Qt integration
There are some instructions available on the Qt Wiki.

